15/03/2025: updated for Kamal 2.
Introduction
Kamal is a developer tool that allows you to deploy a Docker application to a cloud VM from your command line.
Today I'll show you step by step how to deploy a Docker application (in my case a Django application) to a VPS on Contabo. Most of the blog posts and articles talk about Hetzner Cloud, but Contabo is as reliable and cheap.
So, first of all we spin off our Cloud VPS instance on Ubuntu; I chosed the 24.04 version.
Secure your VPS
Looking around the web, I found a very useful Ansible playbook to automatically optimize and secure your servers for Kamal (Ubuntu only):
https://github.com/guillaumebriday/kamal-ansible-manager
This script will automatically configure your server with packages to secure it:
- Fail2ban
- UFW
- NTP
The playbook also:
- Install Docker
- Remove Snap
- Disable ssh password login.
To run this script, first install Ansible according to the official documentation.
Prepare the server for Kamal
Before entering in the kamal stuff, there are some more things that need to be done in the server.
First, to avoid the error "permission denied while trying to connect to the Docker daemon socket at unix:///var/run/docker.sock", according to this blog post, you need to create the docker group (if it doesn't exist) and add your user to the docker group:
sudo groupadd docker
sudo usermod -aG docker ${USER}
and then verify that you can run docker commands:
docker run hello-world
With version 2, there is no more need to create a docker private network for Kamal to work (it's created automatically).
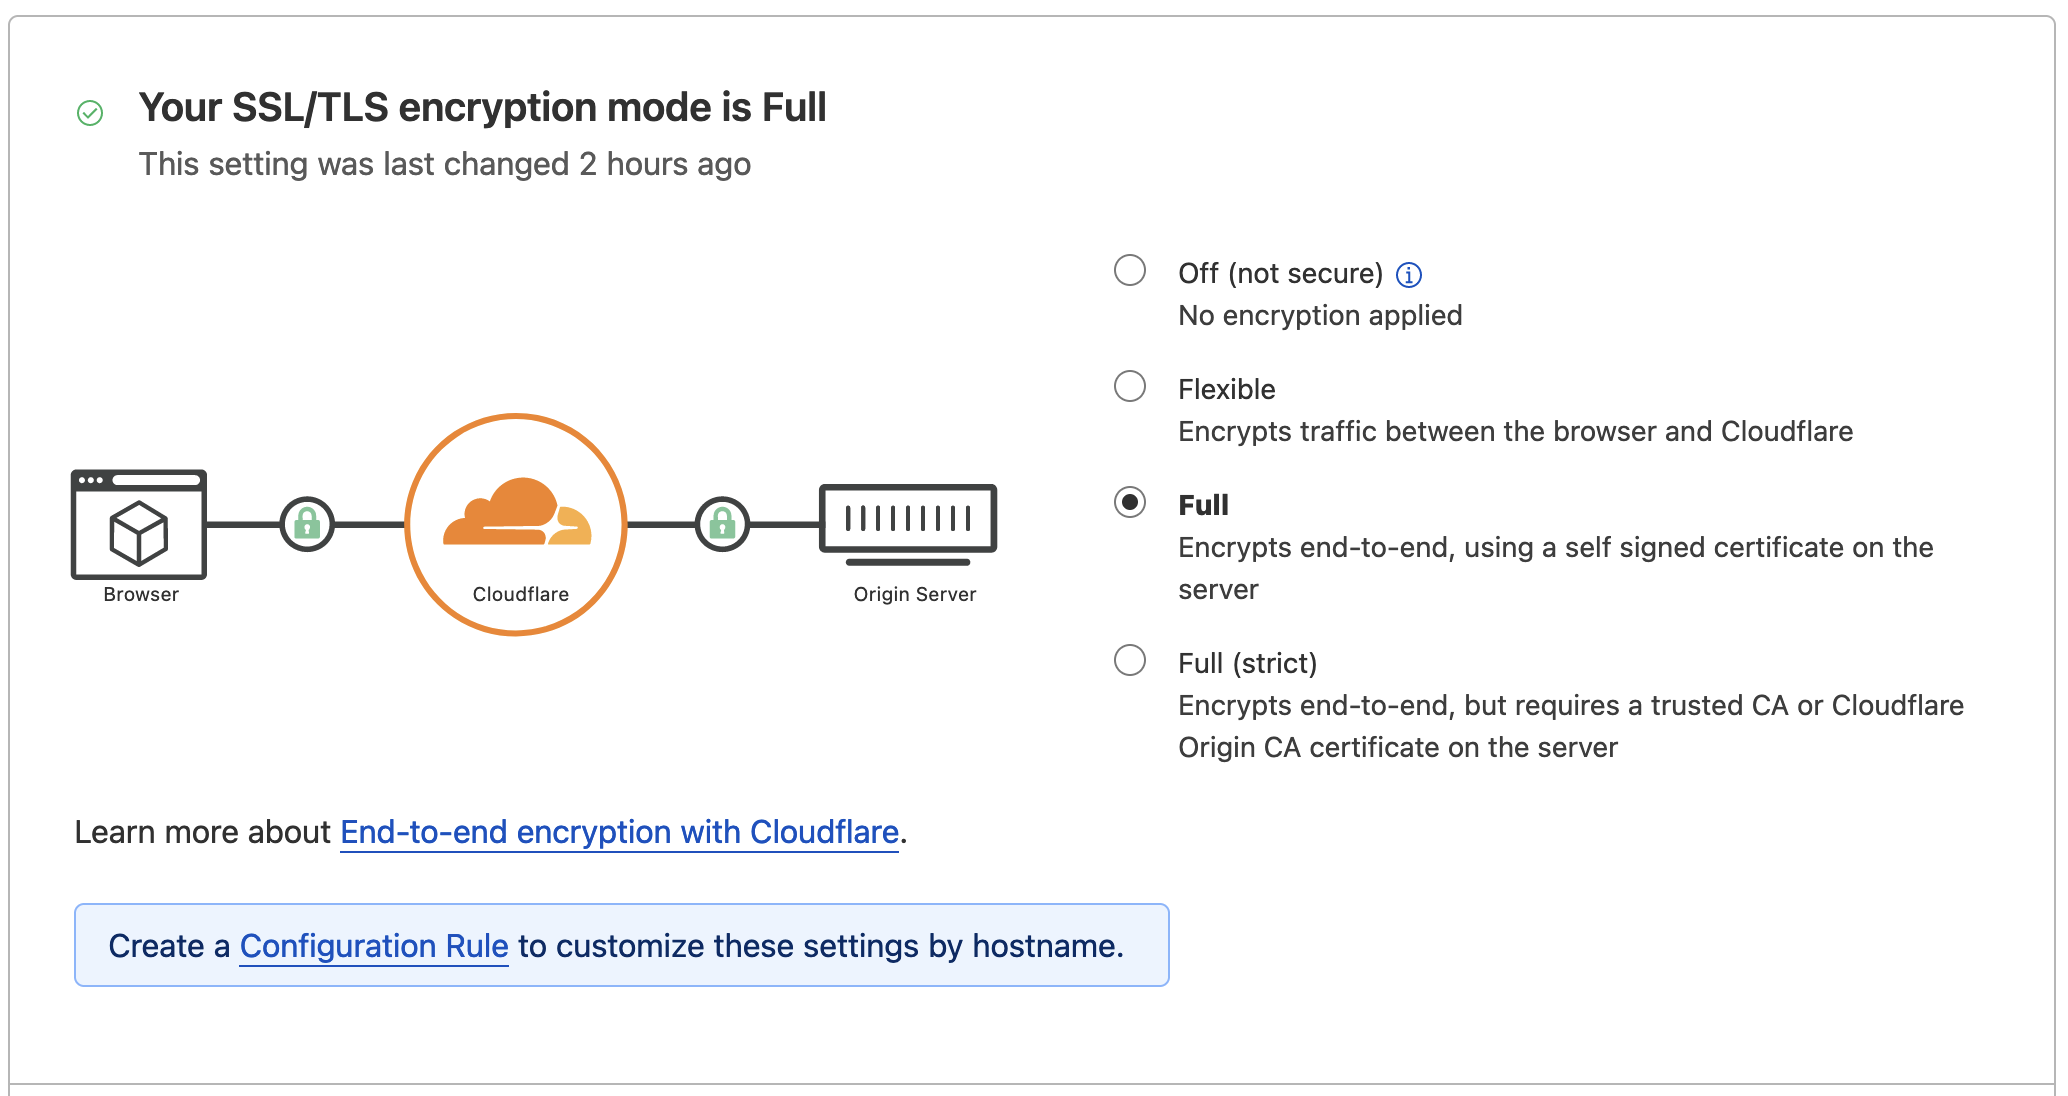
If you use Cloudflare, it's also important to verify your SSL settings. My settings were on "Flexible", and I wasn't able to access the web app, I was getting too many redirections. Setting it to Full, solved the problem:
In the host machine, be sure that you can login to your registry in order to Kamal publish and retrieve the Docker image. I'm using Github, for this you need to define a token with packages read/write permission. Once defined a token (CR_PAT for example), export it as an environment variable and check that:
export CR_PAT=<token_value>
echo $CR_PAT | docker login ghcr.io -u <username> --password-stdin
the registry login is successful.
Deploy your app with Kamal
When everything is fine, go to your project directory and type:
kamal init
This will create a config/deploy.yml file in your project folder. This is mine, now updated to Kamal version 2 which comes with kamal proxy:
# yaml-language-server: $schema=https://raw.githubusercontent.com/kjellberg/mrsk/validate-with-json-schema/lib/mrsk/configuration/schema.yaml

service: dummyapp
image: thomascenni/dummyapp

servers:
  web:
    hosts:
      - &host web105

proxy:
  host: dummyapp.com
  app_port: 8000
  ssl: true
  response_timeout: 10
  healthcheck:
    path: /up/
    interval: 10
    timeout: 3

env:
  clear:
    POSTGRES_USER: dummyapp
    POSTGRES_DB: dummyapp
    POSTGRES_HOST: dummyapp-db
    REDIS_HOST: dummyapp-valkey
    MAINTENANCE_MODE: "None"
  secret:
    - POSTGRES_PASSWORD

accessories:
  db:
    image: postgres:13.5
    host: *host
    env:
      clear:
        POSTGRES_USER: dummyapp
        POSTGRES_DB: dummyapp
      secret:
        - POSTGRES_PASSWORD
    volumes:
      - dummyapp-postgresql-data:/var/lib/postgresql/data
  valkey:
    image: valkey/valkey:7.2.5-bookworm
    host: *host
    directories:
      - data:/data

registry:
  server: ghcr.io
  username: thomascenni
  password:
    - CR_PAT

ssh:
  user: admin

builder:
  arch: amd64
Before deploying your app, boot the accessories with:
kamal accessory boot all
And for the application run:
kamal deploy
A very useful post on the same topic can be found here, but may be isn't updated for Kamal version 2.
Thomas