
Caprover is an open source tool which allows you to build your own PaaS server to host any type of applications and databases (NodeJS, Python, PHP, ASP.NET, Ruby, MySQL, MongoDB, Postgres, etc). Compared to commercial applications, like Heroku, it is a great and cheaper alternative.
Today I’ll show you how to create a Django application and deploy to Caprover step by step. I assume that:
you have a Python virtual environment with Django installed (pip install django).
you have a Caprover server already installed. You can follow their getting started guide, the installation is very easy.
OK so let’s start. We create a project called djcap; you can use the name of the project that you want, but for this tutorial is important to remember this name because it will be used later.
cd ~/Desktop
django-admin startproject djcap
cd djcap
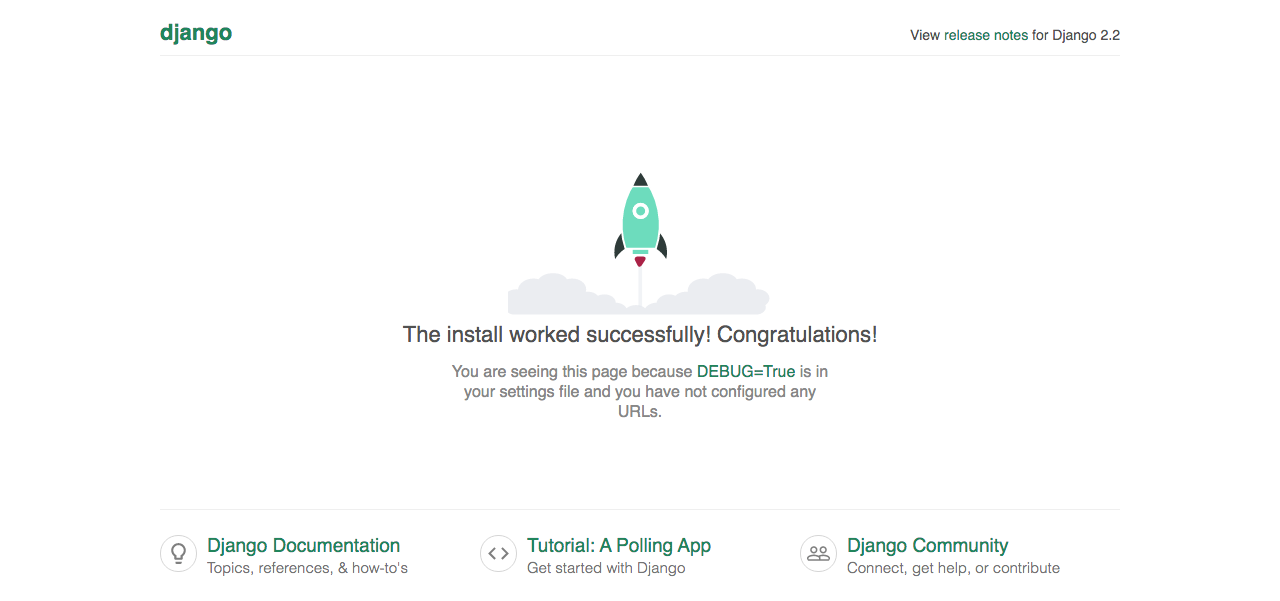
python manage.py runserverThis is the basic starting point of creating a Django project. If everything works fine, pointing the browser to localhost:8000 you’ll see a nice webpage:
Nothing special until now. Remember to create a requirements.txt file to contain all your modules:
pip freeze > requirements.txtIt’s time to prepare the application for Caprover. According to the documentation, Caprover needs a Captain Definition File at the root of your project.
Create a file called captain-definition with the following contents:
{
    "schemaVersion": 2,
    "dockerfilePath": "Dockerfile"
}
This basically tells Caprover to look for a Dockerfile in the root of your project. Now we will use a Docker image with python and nginx to run our web application. There are a lot of alternatives, but I came across this image
tiangolo/meinheld-gunicorn-docker
which totally satisfies my needs and is very limited in size because it uses Alpine Linux, a security-oriented and lightweight Linux distribution.
So these will be the contents of our Dockerfile:
FROM tiangolo/meinheld-gunicorn:python3.7-alpine3.8

RUN mkdir -p /app
RUN mkdir -p /usr/src/static
RUN mkdir -p /usr/src/data

WORKDIR /app
COPY ./ /app

RUN pip install -r requirements.txt
The Docker engine will pull the image, create some directories for the application path and some other static files, set the correctly working directory inside the container, copy all your Django project inside it and then install all the python modules needed by your application to run correctly.
Following the documentation found in the repository of the custom docker image, we can create a prestart.sh file that will be called before the starting of the application:
#! /usr/bin/env bash
# Run collect static and migrations
python manage.py collectstatic --noinput
python manage.py migrate
With this shell script, we are running the Django collectstatic command to copy the static files to our STATIC_ROOT and then the migrate command to make database migrations. For everything working fine, our settings.py file in the djcap project needs to contain the following lines:
STATIC_ROOT = '/usr/src/static'
STATIC_URL = '/static/'
OK, now we will create a new application within our Caprover installation and deploy the djcap project.
From the “Apps” menu, click on the button “One-Click Apps/Databases”:
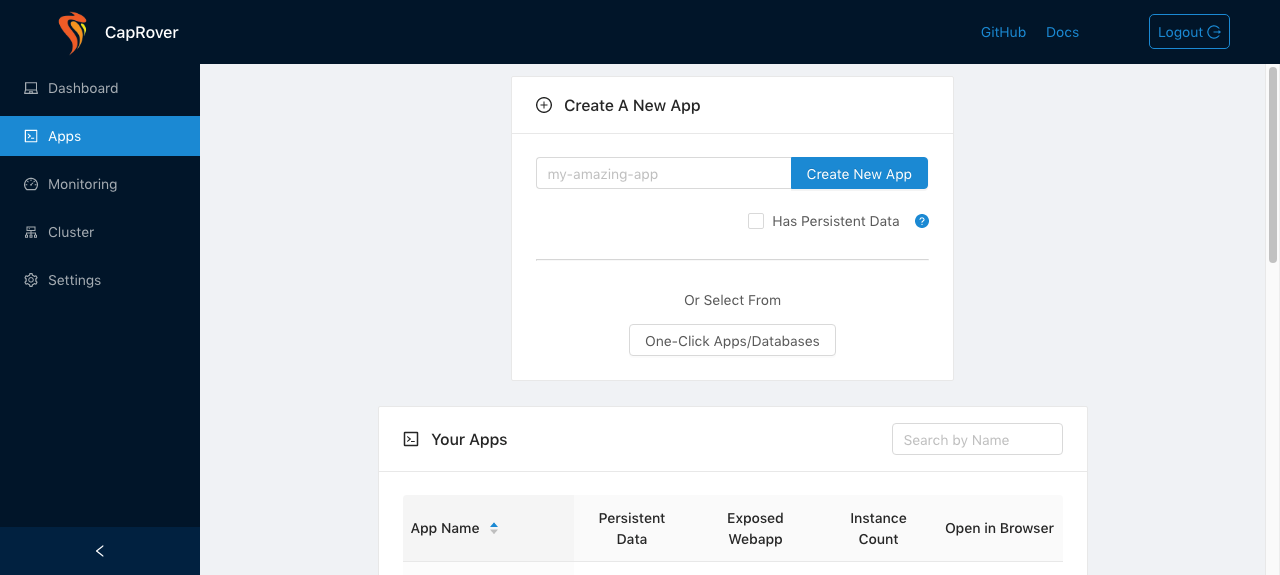
Then from the “One-Click Apps List”, select >> TEMPLATE <<. This list is used if you want to install some already tested and available apps, or, like in our case, if we want to install a custom application. A text box will open, and inside it copy and paste the contents of this file:
{
"captainVersion": "2",
"displayName": "DjCap",
"description": "Deploy a Django application with Caprover PaaS.",
"dockerCompose": {
"version": "2",
"services": {
"$$cap_appname": {
"image": "alpine:3.8",
"containerHttpPort": "80",
"environment": {
"ALLOWED_HOSTS": "$$cap_djcap_allowed_hosts",
"MODULE_NAME": "$$cap_djcap_module_name",
"VARIABLE_NAME": "$$cap_djcap_variable_name"
}
}
}
},
"variables": [
{
"id": "$$cap_djcap_allowed_hosts",
"label": "ALLOWED_HOSTS",
"defaultValue": "*"
},
{
"id": "$$cap_djcap_module_name",
"label": "MODULE_NAME",
"defaultValue": "djcap.wsgi"
},
{
"id": "$$cap_djcap_variable_name",
"label": "VARIABLE_NAME",
"defaultValue": "application"
}
]
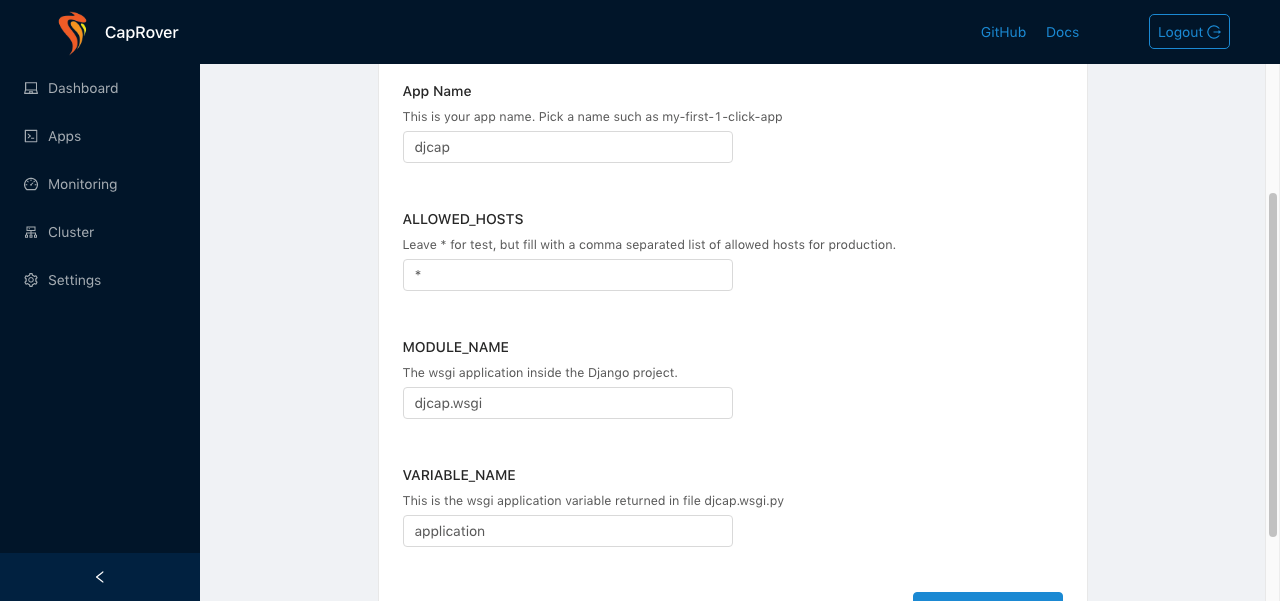
}Click “Next”. In the following page, the only field you need to fill is the “App Name”; chose the name you want, but remember that the field “MODULE_NAME” needs to be coherent with the name of the project you choose when you created the Django project (in my case, “djcap.wsgi”).
Click the button Deploy. Basically an empty application based on Alpine 3.8 is created with the correct Environmental Variables needed to run it.

Good. At this time, no application is running. It is time to deploy the real Django application.
Following the Caprover deployment guide, the simplest and best way is to deploy via command line. Follow the instructions to install the CLI:
npm install -g caproverThen, always in the root directory of the Django project, run the command:
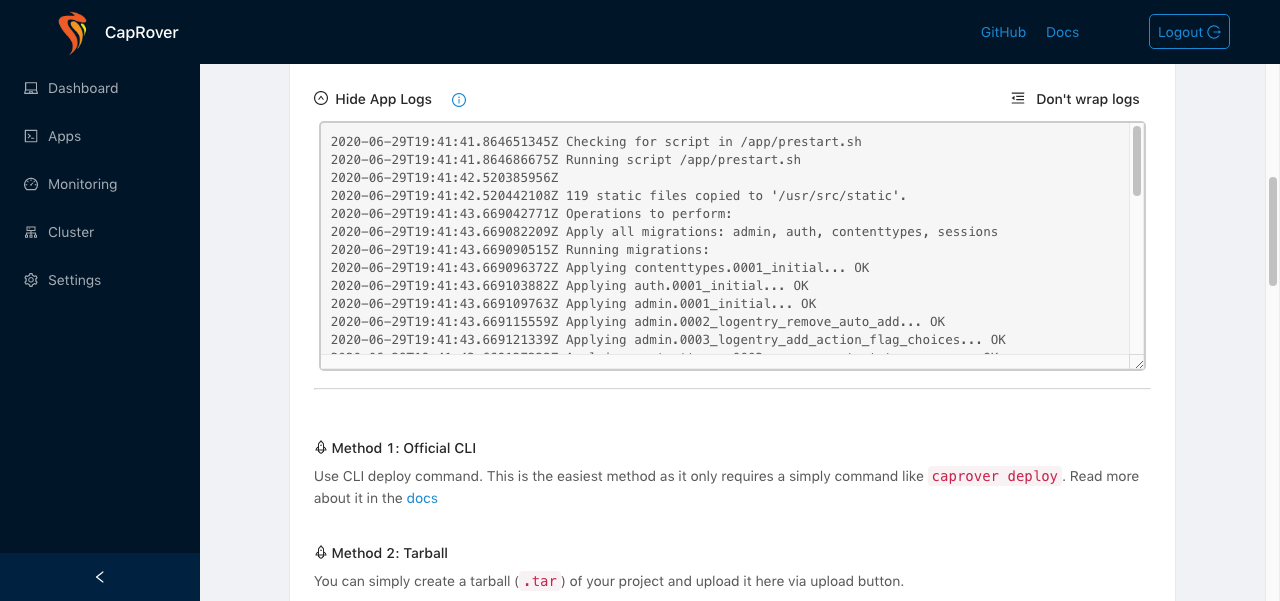
caprover deployYou’ll be asked to enter the URL of the Caprover server, the name of the application and a password. Once the image is built, you can follow the application logs and see that gunicorn is running and serving your Django app.
You’ll find the project in my Github repository: thomascenni/djcap.
N.B.: for production, remember to set Debug=False and SECRET_KEY as an additional environment variable. For correct static files serving, you should use WhiteNoise.